Previous installments: Part #1: How to create maps & Part #2: How to plan for food
Now that we’ve created maps and bought food, we can begin to package our food rations and get them ready to be shipped.
Step #1: Get boxes
First things first: We need boxes. Perhaps there’s a cheaper way to do it than I did, but I chose to use Priority Mail boxes from the U.S. Postal Service. The boxes, themselves, are free, and can easily be obtained. You can pick them up at a local post office, but it would be wiser to have them shipped to you because your post office may have a limited supply. (Online, you can order as many boxes as you’d like and have them shipped to you for free.)
I used two box sizes. I used “medium flat rate boxes” (11” x 8 ½” x 5 ½”), and “large flat rate boxes” (12” x 12” x 5 ½”).
The medium cost me $12.35 to ship in the US (and about $35 to ship to Canada). I could easily fit 3-4 days’ worth of food in the medium box, or tightly cram five days’ worth of food if I was lucky.

The large flat rate box cost me $16.85 to ship in the US (and about $66 to ship to Canada). I could easily fit 5-6 days’ worth of food, and up to eight days’ worth if I packed it in tightly.

Other packaging items needed: black sharpie marker to write on boxes, priority mail address stickers (that can be gotten for free at post offices), and one of those tape rollers, as you’ll be using lots of tape.
Step #2: Make a list of post offices on your route that you will ship to
To hike efficiently, you want to: 1. Carry as little weight as necessary, and 2. Put yourself in a situation in which you don’t have to worry about finding, buying, or picking up your food package every day or every couple of days.
Ideally, I think it’s safe to plan to fill your boxes with five days’ worth of food. One day’s worth of food weighs about 2 lbs, and I think 10 lbs for five days’ worth of food is a manageable load to carry. If you mail yourself, say, three days’ worth of food, this will cost you much more in shipping fees since it will require that you ship many more boxes. Plus, you’ll have to stop at post offices more often, which will slow you down. This can be awfully inconvenient, especially since post offices are closed during evenings, and many aren’t open at all on weekends. This can create logistical headaches. So five days’ worth of food is a nice middle ground. The weight and shipping cost will be reasonable, and you won’t be burdened with the inconvenience of having to go to town every three days.
Since I planned on walking 20 miles a day, I tried to find post offices about 100 miles apart. I was able to do this sometimes, but for remote areas I had to pack as many as 8 days’ worth of food when I was 159 miles between post offices. This means that many of my boxes will differ in size, in weight, and in content. And because of this, figuring out what goes in each box requires a bit of planning and simple math.
But before we get to that, look up the towns you’ll be walking through and find out if they have a post office. You can do this using basic searches on the US or Canadian postal service websites. If the town does have a post office, write down basic information (address, directions, phone number, hours, and how many miles till your next selected post office, and carry this information with you).

Most post offices, once they receive your box, will hold the box for between 15 and 30 days. After that many days, they will ship it back to the return address. Because you may be delayed on your hike and may not make it to the post office in time, you will want to take preemptive action before your hike to make sure post offices will hold your box, even after their normal holding period. One way to do this is to carry the post office’s phone number and keep in touch with them. Most of the post offices I dealt with were run by one postmaster or postmistress, and they were all very nice and accommodating. I also think it would be helpful and courteous to send each post office a letter before you take off on your trip, explaining what you’re doing, that you’re on a big hike, and that the box they will receive will contain much-needed food. Because of such a letter, they will be less puzzled about the mysterious box, and they will feel like they’re a part of your journey. Suddenly they won’t care about their 15-day holding policy.

Lastly, write on the box when the approximate pick up date will be, which I had yet to do on the box pictured below.

Step #3: Plan out every box
First things first: Make a list of what you need in every box. If you’ve gotten to this point, you already know what post offices you’re going to ship your food to, and thus how much distance you’ll have to walk between post offices (100 miles), and thus how many days you’ll be walking (5 days), and thus how much food you’ll need for every item in that box (5 oz of dehydrated milk).
I have 20 boxes to send, so that means I will have 20 bags of, say, dehydrated milk, and 20 bags of chips, and 20 bags of a lot of other stuff. To save time, you do not want to do one box at a time—bagging your milk, your chips, you dinner meals, and stuffing it in one box. Rather, you should take an assembly line approach. Make 20 bags of milk, then 20 bags of chips, etc.—and then pack your boxes.

Here’s a photo of a section of my packing list. You’ll see that the amount I pack per box depends entirely on how many days I expect that box to last me.

Step #4: Package your food in Ziplocks
So now that you know you need 4 oz of milk for Box #4, 5 oz of milk for Box #5, and so on, we should create 20 bags of milk, writing what box number they are to be placed in onto the plastic Ziploc bag.

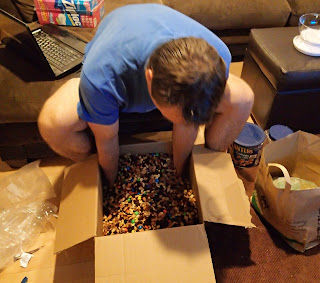
Do everything you can to lessen your workload. For instance, mix up your trail mix ingredients in a big bin or box. I used the same box to crush and mix my chips. (Crushed chips take up less space.)

Now that you’ve made bags of everything, you can begin to place everything in their designated box.


You’ll also want to consider including other non-food items to save weight. Instead of carrying a big clunky bottle of sunscreen lotion for the entirety of your trip, send yourself a series of small travel-sized bottles. Other non-food items I included:
Aluminum foil windscreens (10). These will last several weeks before the need to be replaced. I shipped myself one for about every 10 days.
Cat food canister stove (6).
Mini sunscreen bottle (6)
Lithium batteries for my for my iPad Bluetooth keyboard
A trashbag for every box. The trash bags were inserted into my backpack so that my contents inside were waterproof. (Be sure to get tall trash bags!)
Select maps for the area you’re about to travel through.
Book of matches
Water treatment drops


Step #5: Recruit a trusty friend/family member to ship your stuff
You will need someone to ship your items for you. Unfortunately, you cannot ship them all at once because post offices will not hold your boxes for months on end. Plus, your plans are likely to change while on your hike, and you might need your friend to include an extra item, or you might even decide that your route will not be taking you to this or that post office anymore.
So you need a friend to do this work for you. Try to make it as easy for them as possible. Have the packages all packed up. Have the address written on the packages. Give them all the money they’ll need for sending them out.
Priority mail boxes are shipped to their destinations rapidly (2-3 days). You will need to constantly be in touch with your friend, so that he or she can mail the boxes to the select post offices at the right times. I asked Josh, typically, to send about three boxes at a time, so that he didn’t have to be going to the post office every single week, or several times a week.
Extra notes:
-Document everything in Word files and carry those papers with you. Give a set to your friend.
-Don’t get the Ziplocks with the crappy zippers. These fell apart or broke more times than I can count. Also, be sure to get varying sizes (freezer bag, sandwich bag, etc.).


Cost of 2012-13 Keystone XL Expedition so far….
Maps: $350
Food: $998
Shipping packages: $406
Total: $1,754
Other installments: Part 1. How to map Part 2. How to organize food Part 4. How to outfit yourself with gear
Comments